At Deer Hipster Studios, we recently had the exciting opportunity to collaborate with Heineken on their innovative Heineken Silver Sessions. This project brings together sponsored artists for engaging videocast chats, culminating in a collaborative musical performance. As part of this initiative, we were entrusted with recording three tracks featuring a stellar lineup of artists: Dino d’Santiago and Branko, Inês Apenas and Irma, and Ivandro and Pikika.

Capturing the Magic

The recordings took place in a photography studio, presenting a challenge with its big open space and high ceiling. We used an Allen & Heath SQ5 mixer, Shure ULX microphones, and a Schoeps MK41 to ensure each performance was captured with precision. The gain staging had to be very precise to capture the most out of the sound while managing the ambient noise effectively.

Spotlight on Inês Apenas and Irma

The collaboration with Inês Apenas and Irma was a standout moment. We took on the challenge of mixing and mastering their track “Se ao menos”. The recordings were of very high quality, with a healthy dynamic range, which facilitated all post-production stages. Our mixing managed to capture the rawness and liveliness of the performance, ensuring that what the listener hears matches what they see. You can check out the featured track on Heineken’s Instagram.

To achieve the desired sound, we utilized our Midas F32 mixer, Drawmer 1968 MKII compressor, Fab-Filter’s Pro-Q3, Eventide Blackhole reverb, and Waves H-delay. The mastering process, utilizing the API2500 compressor, Fab-Filter Pro-Q3, Amek 200 EQ, Ozone 11 Maximizer, and Fab-Filter Pro-L, ensured the track’s clarity and impact were maximized for digital platforms.

Reflections on the Experience

Working on the Heineken Silver Sessions was a rewarding experience that highlighted the importance of collaboration, innovation and communication in music production. It reinforced our commitment to delivering high-quality audio that complements the artists’ vision and Heineken’s brand image.

Vocal Recording Techniques – Capturing the Perfect Take

Recording vocals is an art that requires both technical skill and creative intuition. Capturing the perfect vocal take can elevate a song and connect with listeners on an emotional level. In this post, we’ll explore essential techniques to help you achieve professional-quality vocal recordings in your home studio.

Microphone Selection and Placement:

  • Choose the Right Microphone: Different microphones suit different vocal styles. Consider using a condenser mic for clarity and detail or a dynamic mic for a warmer sound.
  • Experiment with Placement: Position the microphone at different angles and distances to find the sweet spot. A pop filter can not only help reduce plosive sounds and protect the mic but also set the distance you want the singer to be from the mic.

Techniques for Different Vocal Styles:

  • Pop and Rock Vocals: Focus on capturing energy and emotion. Encourage the vocalist to perform with intensity and use compression to control dynamics.
  • Soft and Acoustic Vocals: Aim for intimacy and warmth. Use minimal processing and allow the natural tone of the voice to shine through.

Tips for Working with Vocalists:

  • Create a Comfortable Atmosphere: Make the vocalist feel at ease to encourage their best performance. Offer guidance and positive feedback.
  • Communicate Clearly: Discuss the desired sound and style before recording. Provide direction during takes to achieve the best results.

Post-Recording Processing Tips:

  • Edit with Care: Clean up any unwanted noise or mistakes, but maintain the natural feel of the performance.
  • Enhance with Effects: Use reverb, delay, and EQ to add depth and character to the vocals. Be subtle to avoid overpowering the original sound.

Conclusion: By mastering these vocal recording techniques, you can capture performances that resonate with listeners and enhance your music. With practice and experimentation, you’ll develop your unique approach to recording vocals, allowing you to create tracks that truly stand out.

Preparing for a Recording Session – Setting Yourself Up for Success


A successful recording session begins long before you hit the record button. Proper preparation can make all the difference in capturing high-quality audio and ensuring a smooth workflow. In this post, we’ll explore essential steps to set yourself up for success in your home studio.

Pre-Session Planning and Organization:

  • Define Your Goals: Clearly outline what you want to achieve in the session. Whether it’s recording a single track or an entire album, having a clear plan will guide your workflow.
  • Create a Session Checklist: List all the tasks you need to complete before, during, and after the session. This includes setting up equipment, testing connections, and organizing files.
  • Schedule Your Time: Allocate specific time slots for each part of the session, including breaks. This helps maintain focus, prevents burnout, and avoids losing perspective.

Equipment Checklist and Setup Tips:

  • Select the Right Gear: Consider what equipment and techniques you’ll need to convey your desired message. Think about mic positioning, miking techniques, and effects that will enhance your sound. Choose gear that aligns with the style and emotion you want to express.
  • Organize Your Space: Arrange your studio to minimize clutter and distractions. Ensure all necessary equipment is within easy reach.
  • Use Templates or Prepare Your Setup: Use templates in your DAW or prepare your setup to start recording as quickly as possible. By automating repetitive tasks, you can focus more on the creative aspects of music production.

Creating a Comfortable Recording Environment:

  • Set the Mood: Do whatever encourages vulnerability and comfort, such as adjusting lighting and temperature. This helps you feel safe to express your emotions and convey your message genuinely.
  • Minimize Interruptions: Minimize distractions that are exterior to the production. Reducing these distractions is crucial because if you’re in a creative flow, spending too much time on setup tasks like preparing a track, amp, or DI for a guitar riff can cause you to lose your train of thought and your creative flow.
  • Personalize Your Space: Add personal touches to your studio that inspire you. While plants and artwork work for many, choose elements that resonate with your unique creativity.

Workflow Tips to Maximize Efficiency and Creativity:

  • Use Templates: Create session templates in your DAW to streamline setup. Include commonly used tracks and settings to save time.
  • Label and Organize Tracks: Clearly label each track and use color coding to keep your session organized. Learn the abbreviations that professional engineers use to name tracks and instruments. This prepares you for future collaborations, whether hiring someone to mix your songs or inviting an artist to do a remix.
  • Stay Flexible: While planning is crucial, be open to spontaneous creativity. Allow room for experimentation and improvisation.

Conclusion: By taking the time to prepare thoroughly, you can ensure a productive and enjoyable recording session. Effective preparation helps streamline your workflow and reduces stress, giving you more time and less mental clutter to focus on what you’re there for—creating music.

Gain Staging – The Key to Clean and Better Sounding Recordings

Gain staging is a fundamental concept in audio recording that can make or break the quality of your tracks. Proper gain staging ensures that your audio signals are clean, clear, and free from unwanted distortion or noise. In this post, we’ll explore what gain staging is, why it’s important, and how you can master it in your home studio.

What is Gain Staging?

  • Definition: Gain staging is the process of managing the levels of audio signals at each stage of the recording and mixing process. It involves setting the optimal input and output levels to maintain a clean signal path.
  • Purpose: The goal of gain staging is to achieve the best possible signal-to-noise ratio, ensuring that your recordings are free from distortion and unwanted noise.

Understanding Gain vs. Volume:

  • Gain: A good friend and talented sound engineer and artist, Twofold, shared a helpful analogy with me: think of gain as the size of a bubble or mushroom around your microphone (this bubble’s shape and size can vary depending on the microphone’s type, such as cardioid, hypercardioid, etc.). When you increase the gain, you’re expanding this bubble, widening the microphone’s capturing area. This means even quieter sounds can be picked up. However, if the bubble gets too big, it can capture unwanted noise or cause distortion.
  • Volume: Volume is like the fader that controls how loud the sound is played back through your speakers or headphones. It doesn’t change the size of the bubble; it just makes the sound captured by the bubble louder or softer for listening.

Why is Gain Staging Important?

  • Preventing Distortion: Proper gain staging helps prevent clipping and distortion, which can occur when audio signals are too hot (too loud) at any stage.
  • Maintaining Clarity: By keeping levels consistent, gain staging ensures that your recordings maintain clarity and detail.
  • Optimizing Signal-to-Noise Ratio: The signal-to-noise ratio is the balance between the audio signal you want to capture and the background noise. A higher ratio means clearer sound with less noise. If the audio signal is too low, it will need to be amplified later to reach the desired volume. This amplification can also increase unwanted noise, such as background noise and the inherent noise of instruments, raising these noises to the same “volume” as the desired audio and compromising the quality of the recording.
  • Optimizing Dynamic Range: Proper gain staging allows you to make full use of your equipment’s dynamic range, capturing both the quietest and loudest parts of a performance accurately.

How to Master Gain Staging:

  1. Set Initial Levels: Start by setting the input gain on your audio interface or preamp. Aim for levels between -18dB to -6dB, adjusting the gain knob to achieve this range. This ensures a strong signal without peaking into the red. You should always take in consideration what you want to achieve when you are adjusting the input level.
  2. Monitor Levels Throughout: Keep an eye on levels at each stage of the recording and mixing process. Use meters to ensure signals are neither too low nor too high.
  3. Use Headroom Wisely: Headroom is the difference between the highest peak of your audio signal and the maximum level of 0dB. Leaving some headroom allows for unexpected peaks in the audio signal without causing distortion or clipping.
  4. Adjust Faders, Not Gains: Once initial levels are set, use faders to adjust the mix balance rather than changing the gain settings.
  5. Check Your Mix: Regularly check your mix for any signs of distortion or noise, and adjust levels as needed.

Common Mistakes to Avoid:

  • Ignoring Input Levels: Failing to set proper input levels can lead to unwanted distorted recordings from the start. Additionally, if the input signal is too low, you’ll need to increase the gain later, which can amplify unwanted noise and compromise the quality of the recording.
  • Overloading Plugins: Ensure that audio signals are not too hot when entering plugins, as this can cause unwanted distortion.
  • Neglecting Headroom: Always leave enough headroom to prevent clipping during dynamic performances. Neglecting headroom affects all subsequent production stages, much like a blurred image cannot be focused afterwards. While 32-bit float recordings can sometimes recover sound if distortion occurs at the input stage, it cannot correct distortion from external sources like a distorted guitar amp or distorted voice.

Conclusion: Mastering gain staging is essential for achieving clean, professional-quality recordings. By understanding and applying these principles, you can ensure that your audio signals remain clear and free from distortion throughout the recording and mixing process. With practice, gain staging will become second nature, allowing you to focus on the creative aspects of your music production.

Sample Rate and Bit Rate – Understanding the Basics

In the world of audio recording, understanding the technical aspects can make a significant difference in the quality of your work. Two fundamental concepts that every home producer should grasp are sample rate and bit rate. These settings can greatly influence the clarity and fidelity of your recordings. In this post, we’ll break down what they mean and how to choose the right settings for your projects.

What is Sample Rate?

  • Definition: Sample rate is like taking snapshots of sound. It tells you how many times per second the sound is captured and turned into digital data. These “snapshots” refer to the individual samples of the sound wave. The more snapshots you take, the more accurately you can recreate the original sound, resulting in clearer and more detailed audio.
  • Why Double the Sample Rate?: To accurately capture all the details of a sound, the sample rate should be at least twice the highest frequency you want to record. This is known as the Nyquist Theorem. For example, since human hearing typically ranges up to 20 kHz, a sample rate of 44.1 kHz is commonly used to ensure all audible frequencies are captured.
  • Higher Sample Rates: Using a higher sample rate, like 96 kHz or 192 kHz, can capture even more detail and provide a more accurate representation of the original sound. This is especially beneficial for high-resolution audio projects where the utmost clarity is desired.

What is Bit Rate?

  • Definition: Bit rate is like the detail level of your audio. It tells you how much information is captured in each second of sound. Imagine it as dots on the soundwave that capture the amplitude, or volume, of the sound at each point. The more dots (or bits) you have, the more accurately you can capture the variations in loudness, resulting in better sound quality. It’s similar to how a high-definition photo has more detail than a low-resolution one.
  • Common Bit Depths: 16-bit, 24-bit, and 32-bit float. These numbers indicate how many dots are used to capture each sample.
  • Impact on Dynamic Range: Higher bit depths provide a greater dynamic range, meaning they can capture both the quietest and loudest parts of a sound more accurately. This results in clearer and more nuanced recordings.
  • Choosing the Right Bit Rate: For most music projects, using a bit depth of 32-bit is recommended for capturing the highest level of detail and dynamic range. However, 24-bit remains a solid minimum standard for professional-quality recordings.

Practical Examples and Recommendations:

  • Minimum Standard for Recording: For most recording projects, a sample rate of 48 kHz and a bit depth of 24-bit should be considered the minimum standard. This ensures a good balance between quality and file size, capturing sufficient detail for professional results.
  • Music Production: For music projects, using a sample rate of 48 kHz and a bit depth of 32-bit is recommended for capturing the highest level of detail and dynamic range. However, 24-bit remains a solid minimum standard for professional-quality recordings.
  • Consistency Across Production Stages: It’s crucial to maintain the same sample rate and bit depth throughout all production stages, including arranging, overdubbing, and mixing. The bit depth should only be converted by the mastering engineer at the end of all production stages to ensure consistency, quality, and minimize conversions.
  • Film and Video: Often use 48 kHz to align with video standards.
  • High-Resolution Audio: Consider 96 kHz or higher for projects requiring exceptional detail.
  • Storage Considerations: Higher settings require more storage, so balance quality with available resources.

Conclusion: Understanding sample rate and bit depth is crucial for achieving professional-quality recordings. By selecting the appropriate settings for your projects, you can ensure that your audio captures all the nuances and details you desire. As you experiment with different rates and depths, you’ll develop a deeper understanding of how these technical choices impact your sound.

Mastering the Basics for Home Producers

Welcome to the “Recording Essentials” series, where we’ll dive into the core techniques and insights needed to elevate your home studio productions. Whether you’re a budding producer or a seasoned musician, this series is designed to enhance your recording skills and help you create professional-quality tracks.

What to Expect:

  • Comprehensive Guides: Each post will cover essential topics like sample rates, gain staging, and vocal recording techniques.
  • Practical Tips: Learn actionable tips and tricks to improve your workflow and sound quality. We’ll also teach you how to think critically about which tools are best to achieve your intended sound.
  • Expert Insights: Benefit from industry knowledge that can transform your approach to music production.

Why It Matters: In today’s music landscape, the ability to produce high-quality recordings from home is more important than ever. This series will equip you with the tools and knowledge to achieve the best recordings possible with the resources you have, whether you’re working on personal projects or professional releases.

Join Us on This Journey: Stay tuned as we explore each topic in detail, providing you with the skills and confidence to take your recordings to the next level. We invite you to engage with us, share your experiences, and grow alongside fellow music enthusiasts.

Conclusion: We’re excited to embark on this journey with you. Let’s unlock the potential of your home studio and create music that resonates with listeners. Keep an eye out for our first post, and let’s get started!

At Deer Hipster Studios, we pride ourselves on delivering exceptional sound quality, whether in the studio or live on stage. One of our standout projects was mixing and mastering a live concert for Mazarin, a talented nu jazz quintet from Portugal. This project was not only a technical challenge but also a rewarding experience that showcased our expertise in sound engineering.

The Band and the Venue

Mazarin, known for their innovative nu jazz sound, performed at the iconic Lux Frágil, a venue where I had the privilege of working as the head of sound. The goal was to capture the live energy of their performance while achieving studio-quality sound. This meant that if the band chose to release the album, listeners wouldn’t necessarily know it was recorded live.

The Challenge

The primary challenge was to disguise audience and room noise while maintaining the authenticity of a live performance. This required meticulous attention to detail and a strategic approach to mixing and micking.

My Role

As the Front of House, Monitor, and Recording engineer, I had comprehensive control over the mic positioning and gain stage. This setup allowed for a smoother transition to post-production work in the studio.

Technical Approach

We used a Midas M32 mixer, with SM58 mics for vocals, SM57s and a Beta52 for the drum kit, SM81s for overheads, and Klark Teknik DIs for synths and bass. The real magic happened during audio cleaning, where RX played a crucial role. The aim was to create a stage perspective, balancing the clean signal with just enough spill from stage monitors and amps, along with the crowd’s presence.

The Outcome

The result was a beautifully mixed and mastered concert that received national radio exposure, a testament to the quality and impact of our work. This project not only highlighted our technical skills but also reinforced our commitment to delivering exceptional sound experiences.

Reflections

Working on the Mazarin concert was a valuable learning experience. It demonstrated the importance of balancing technical precision with creative expression, a lesson that continues to influence our work today.

Mazarin – Caçadores (live at Lux Frágil)

At Deer Hipster Studios, we had the privilege of working with Soluna, a talented vocalist known for her work as a background singer for the renowned Dino d’Santiago. Soluna’s artistry extends beyond her collaborations, as she captivates audiences with her unique sound and presence. Her live concert at Lux Frágil was a testament to her talent and the vibrant energy she brings to the stage.

Project Overview:

For Soluna’s live concert at Lux Frágil, I took on the roles of Front of House and Monitor Engineer, ensuring the live sound was perfectly balanced for both the audience and the performers on stage. Beyond the live performance, I recorded the entire concert, bringing it back to the studio for mixing and mastering. This comprehensive approach allowed us to capture the essence of Soluna’s live energy while refining the sound to studio quality.

Goals and Challenges:

The primary goal of this project was to capture studio-quality recordings of Soluna’s epic concert at Lux Frágil. This task was particularly challenging due to the crowded stage, which resulted in significant spill. Navigating these challenges required careful planning and execution to ensure the final recordings maintained the clarity and quality expected from a studio production.

Technical Details:

To mix and record Soluna’s live show, I utilized a Midas M32 mixer. Once the recordings were back in the studio, significant audio cleaning was necessary to minimize spill from the crowded stage. Proper gain staging proved challenging, adding another layer of complexity to the project.

One of the highlights was a beautiful guitar solo by the incredibly talented Eugénia Contente on “Undengue Uamie.” Given the live nature of the performance, I embraced the natural placement of the guitar within the mix, allowing it to sit slightly back. This decision informed the overall mixing perspective, capturing the concert from the crowd’s point of view. It created an authentic live experience, where listeners can even pinpoint Eugénia’s amp location on stage, which truly worked wonders for the mix!

Outcome:

The process of mixing and mastering Soluna’s live concert was a rewarding experience in itself. The meticulous attention to detail and creative decisions made throughout the project resulted in a final product that truly captured the essence of the live performance.

Personal Insights:

Reflecting on the project, I was particularly pleased with how the effects were used to emphasize the emotions throughout the show, without overshadowing the live performance of four fantastic musicians. It was a delicate balance that allowed Soluna’s artistry and the band’s talent to shine through, replicating the authentic and immersive experience for the audience.

Soluna – Undengue Uamie (live at Lux Frágil)

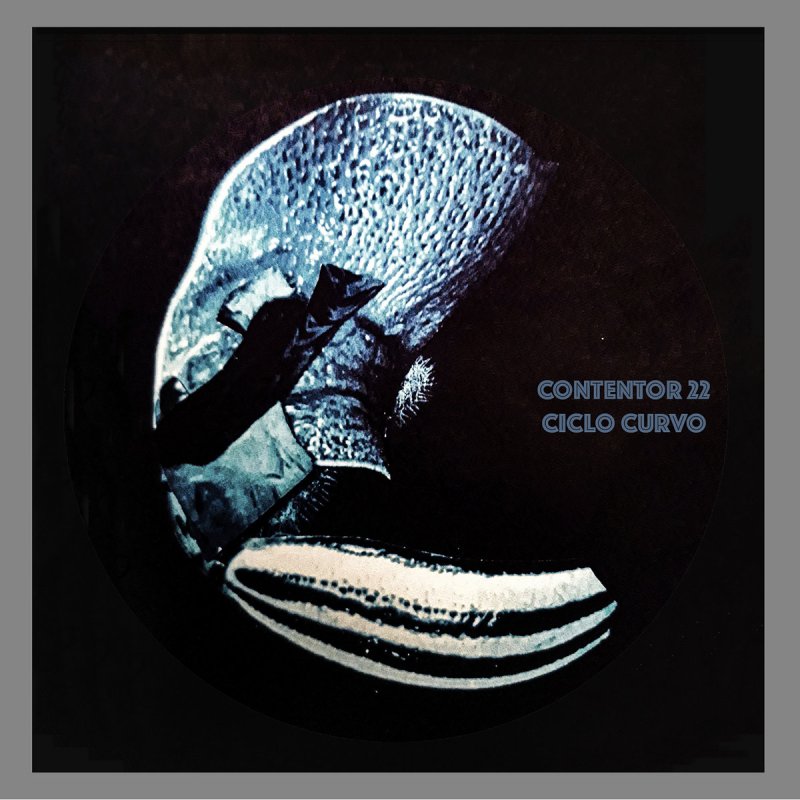
At Deer Hipster Studios, we had the pleasure of working with Contentor, a talented Portuguese group known for their extraordinary modern pop music. This project involved recording, mixing, and mastering their album ‘Ciclo Curvo,’ inspired by João Eduardo’s book “O Ciclo Curvo das Noites.”

The Band and Their Vision

Contentor, now known as Content, consists of five wonderful musicians who draw inspiration from the world around them. Their music, written in both Portuguese and English, reflects a deep connection to the themes they explore. ‘Ciclo Curvo’ was an intimate project for everyone involved, aiming to capture the essence of the book’s themes.

The Approach

Given the album’s intimate nature, we aimed for sober and raw mixes, only adding effects to emphasize the melancholy or introduce psychedelic moments. This approach allowed us to provide listeners with an otherworldly experience, aligning perfectly with the album’s themes.

Our Role

We recorded all the vocals here at Deer Hipster Studios and took on the task of mixing and mastering the entire album. Using our Midas F32 mixer, Eventide Reverb, and H-Delay from Waves, we crafted a sound that was both authentic and immersive.

Technical Highlights

One standout moment was working on the pre-chorus of “Tudo Tem Seu Tempo.” To reflect the song’s theme of Time, we used a stutter effect, chopped and reversed vocals, and sent them to a delay. This creative process resulted in textures that perfectly encapsulated the idea of a realm where Time defies its usual rules.

The Outcome

The result was an album that resonated with both the band and their audience.

Reflections

Working on ‘Ciclo Curvo’ was a rewarding experience, reinforcing the importance of aligning technical precision with creative expression. It was a journey that deepened our appreciation for the power of music to convey profound themes.

Contentor’s fourth album, Canto das Sereias, offers a captivating exploration of our dreaming condition as human beings. Released exclusively on Bandcamp, this album invites listeners into a world of ethereal soundscapes and introspective themes, masterfully produced by Adriano Lanhoso.

Project Goals:

The album revolves around a common theme of a call for action, a dreaming and dystopic future. To capture this, it needed psychedelic and otherworldly textures. On the track “Subsídio de Perdão,” saturated vocals create a speech-like feel, while emotional layers, synths, and delay emphasize the dreaming condition, with in-your-face drums calling for action.

Your Role:

I recorded and played keys on tracks 1, 2, 3, 5, and 8 at Deer Hipster Studios. Additionally, I recorded all the vocals except on track 10. I also mixed and mastered the entire album at Deer Hipster Studios.

Technical Details:

I mixed the album on a Midas F32 and used the Eventide Space Reverb to create dreamy soundscapes, particularly on tracks like “Dream On.” For the song “Dream On,” Adriano recorded the Kalimba, which had a dreamy feel. I added a nostalgic chord progression, slightly saturated to enhance the nostalgic feeling, and laid it underneath the Kalimba to emphasize the theme of the song.

Outcome:

The band was very satisfied with the outcome, as it was our first project together. The collaboration resulted in a cohesive album that truly captured the intended themes.

Personal Insights:

During the production, I faced challenges like a computer breakdown, which led to the loss of processing on my parts. I recreated textures close to the originals, although not identical. The lack of access to separate drum tracks required a change in the mixing approach to maintain sonic consistency. This project was also challenging due to some of material had already a certain tone. However, the talented musicians’ skills attracted me to work with them, aiming to help them create a cohesive sound, and with adaptation, flexibility and trust, I believe we nailed it.